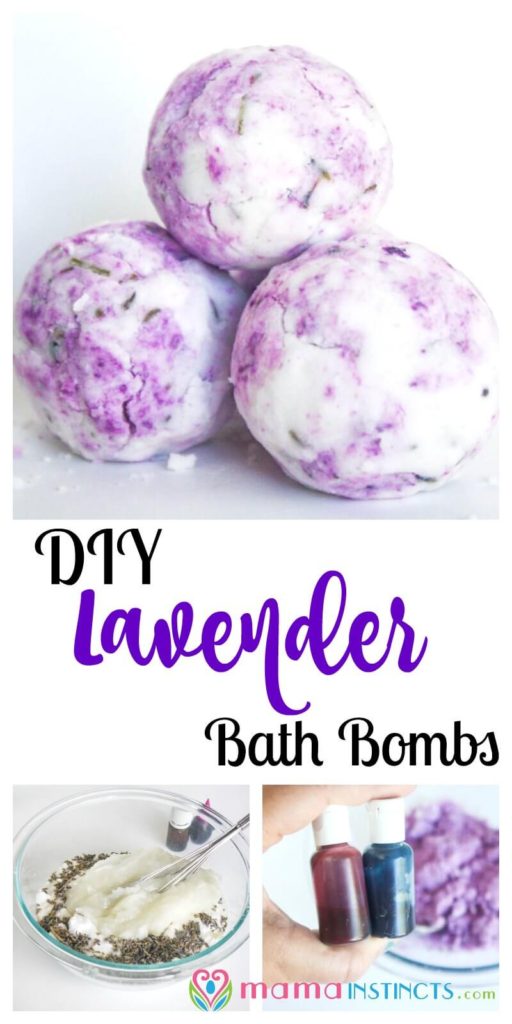
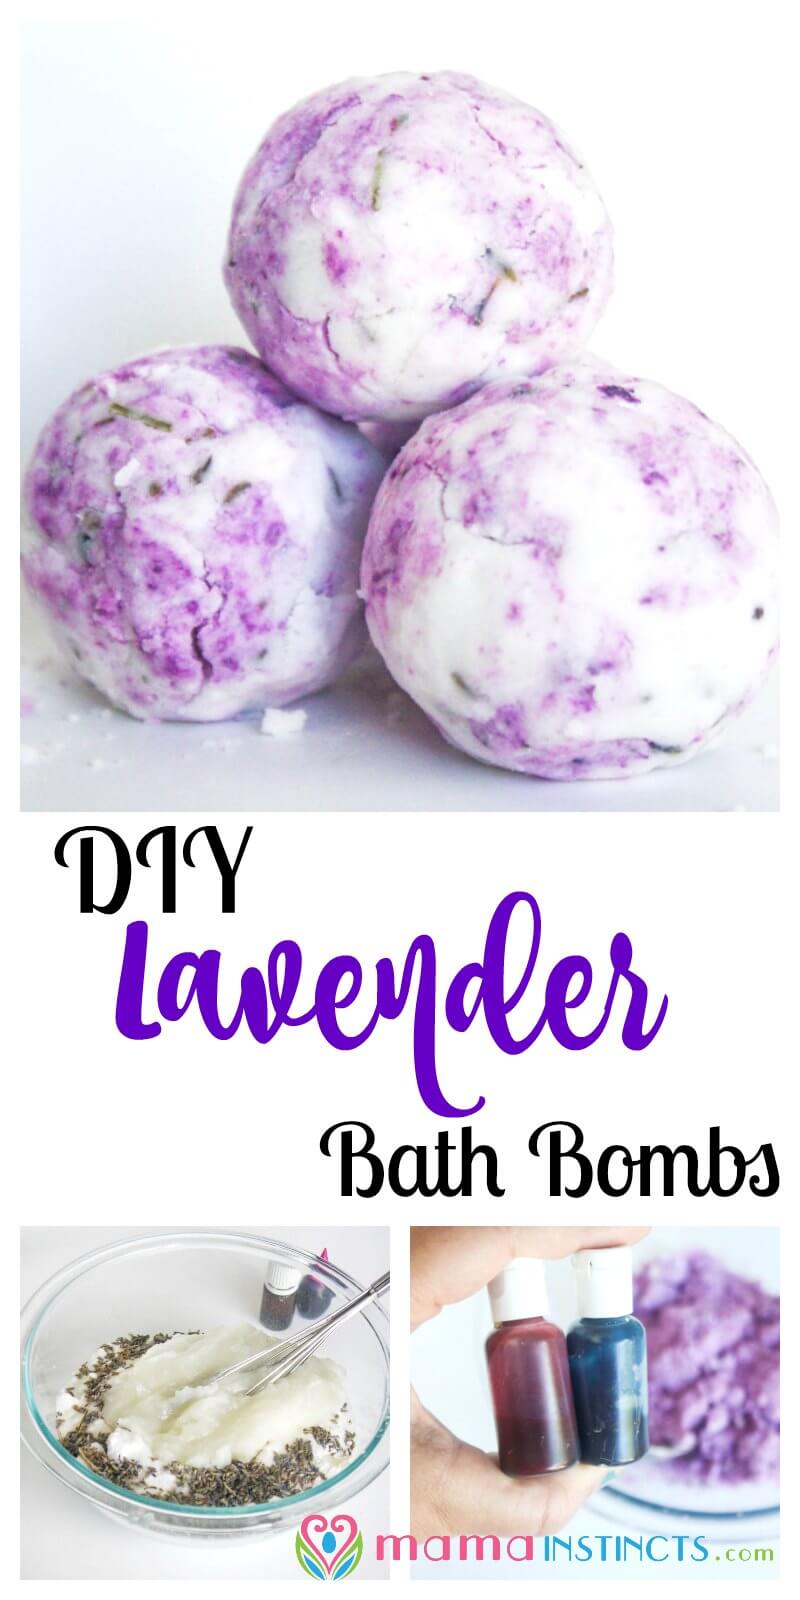
These DIY Lavender Bath Bombs are so simple to make at home. And at the end of a long day, they’re wonderful, too!
Now that I am a mom of two I like to take little breaks, whenever I get a chance, to do something special for me and recharge my “mom batteries”. I usually don’t get a lot of free time and when I do it’s mostly about 30-60 minutes at home.
One of my favorite things to do is to take a bath. There’s something about relaxing in water that makes me feel like a new person. I usually end up with both of my girls in the bath but I get to relax for the first part of it by myself and it feels amazing!
I’ve been experimenting with bath time to make it more “spa like” and that’s how these bath bombs came to life. They make bath time that much more special because it makes my skin feel so soft and it smells delicious. Plus they’re really easy to make and one batch makes about 12 of them, so with just a few minutes of preparation I have enough bath bombs for a few months.
These bath bombs use lavender, lemon and peppermint essential oils as well as lavender flowers. I’ve used them when I feel like I’m getting sick because of the properties of these oils and they’ve helped me feel better.
I hope you love them as much as I do!
What if my bath bomb isn’t holding its shape?
If you’re noticing that it’s starting to crumble, there’s a good chance that you didn’t pack it hard enough into the mold. Make certain that you’re really packing it in so that it forms and holds its shape.
How do you store bath bombs?
The best way to store your homemade bath bombs is to have them in a container, out of the air and elements. You can easily use a small mason jar with a lid to store them until the time has come to use them.
Can I use a bath bomb right after I get done making it?
You can but it’s going to be pretty crumbly…your best bet is to wait a while and then add it to your bath. Give it a few hours and you’re certain to notice a difference.
Did you know we have an e-book with 40 DIY recipes for bath and body products
⇒ ⇒ Check it out ⇐ ⇐
DIY Lavender Bath Bombs
Ingredients:
This recipe creates about 12 bath bombs. If this is your first time making bath bombs, start with half this recipe.
- 16 ounces of organic cornstarch
- 16 ounces of Baking Soda
- 7.5 ounces Citric Acid
- 1 cup Epsom Salt
- 8 tablespoons organic coconut Oil
- 12 teaspoons witch hazel
- 2 tablespoons organic lavender flowers
- 5 drops lavender essential oil
- 5 drops lemon essential oil
- 5 drops peppermint essential oil
- natural food dye as desired (optional)
- Bath bomb mold (or this set)
Directions:
Mix all the dry ingredients together (baking soda, citric acid, cornstarch, flowers).
Stir in 8 tablespoons of coconut oil.
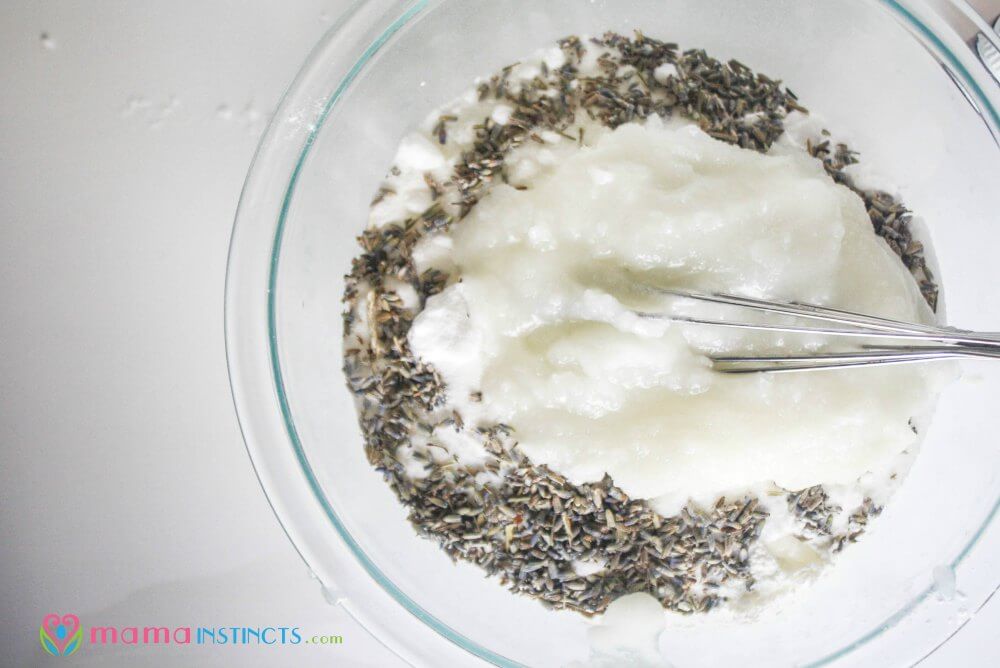
Add in the essential oils and mix well. Add one teaspoon of witch hazel at a time until the consistency is moldable. (It’s almost going to feel like wet sand at this point!)

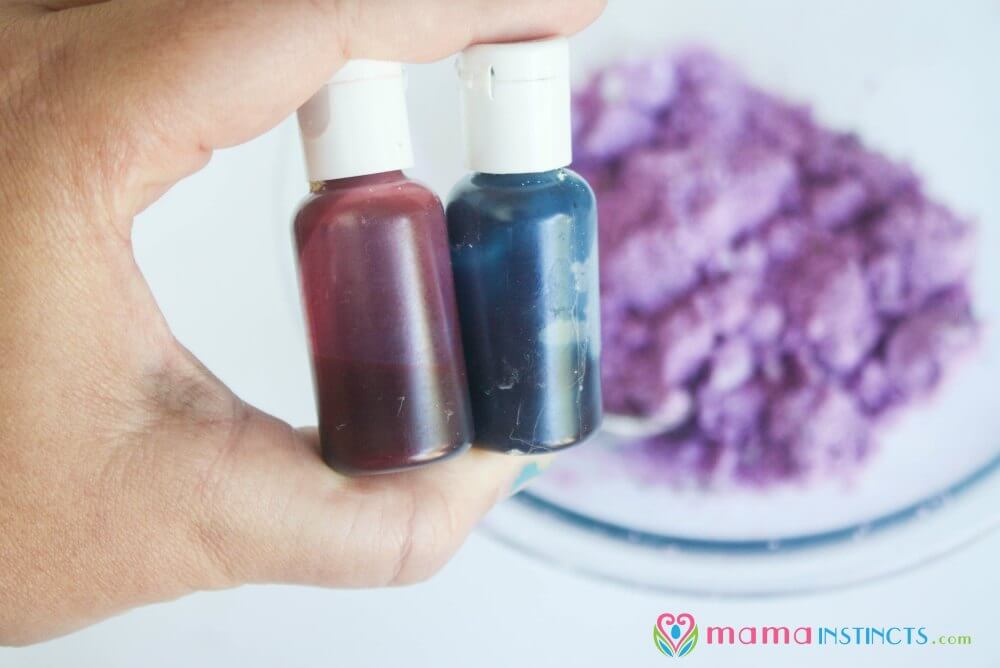
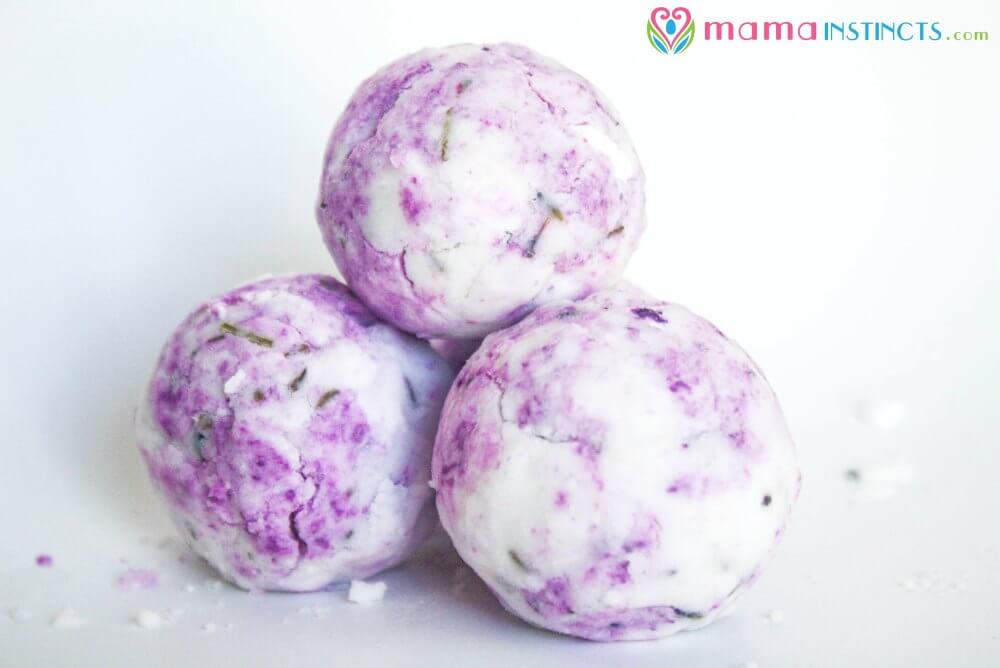
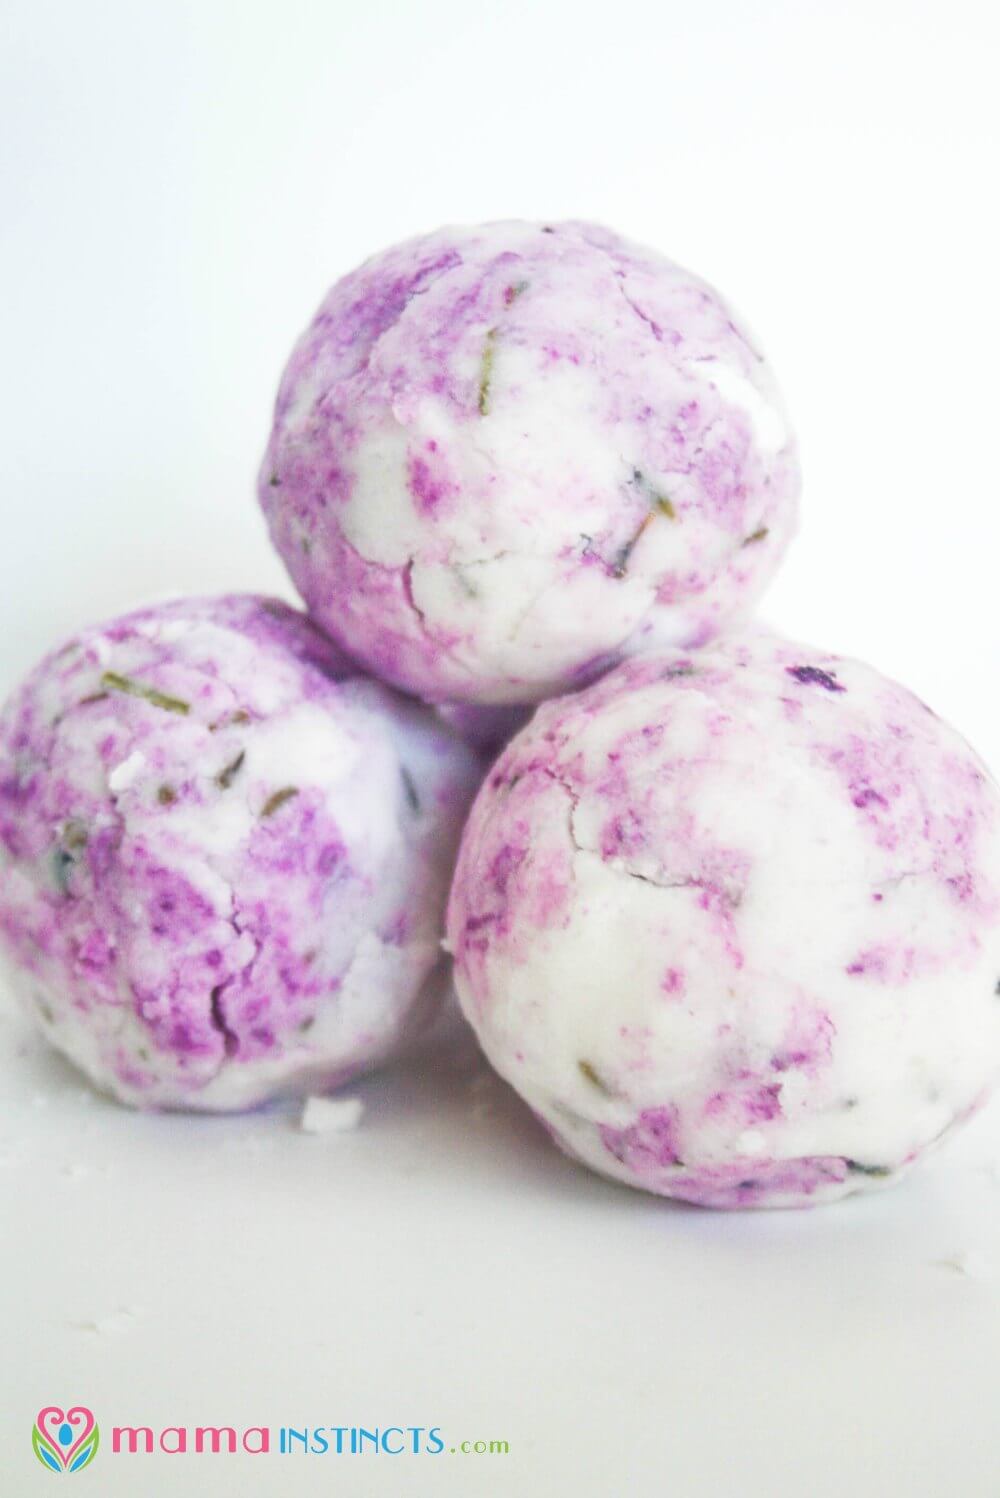
You don’t have to dye the balls but I like how they look dyed, especially if I’m making these for a friend.
If you want to dye yours and get them look like the ones in these pictures then separate the mixture into two bowls. Add the natural food dye to one bowl.
Since I use natural dyes I add some blue and red dyes to make this lavender color.
Now you’ll need to use the bath bomb mold to create the balls.
To give it the marbled look that’s on the pictures, grab some of the mixtures from each bowl and add it directly to the mold. Make sure you pack it tightly and then press firmly both halves of the mold together so you end up with one solid ball. This will prevent the ball from cracking.
Remove any excess and take the bath bomb out of the mold. If it’s gets stuck you can tap the mold with a spoon.
Set parchment paper on a towel in someplace that it won’t be touched. I put mine inside one of my kitchen cabinets. Place all the bath bombs on top of the parchment paper. Allow the bath bombs to dry for two days and then you can put them in a storage container.
Note: You can use a bath bomb right after you make them but they will be crumbly so it’s best to wait a little.
Now all there’s left to do is take a bath, relax and enjoy!
Enjoy!

Seems like too much oil in this recipe, after 2 days of drying they did not dry out!
Ummm… I wonder why. Where in your home do you have them drying? Is it maybe too humid?
I believe it should be 2 tablespoons of coconut oil not 2 cups????
Yes! I’m so sorry! I did some editing and made a mistake. 2 tablespoons is the correct amount.
how big are the bath bombs?
It depends on the size of the mold you use. If you get the one I used: http://amzn.to/2nLSPfp (affiliate), your bath bombs will be 2.56 inches in diameter.
Your recipe is 2 tlbs coconut oil and your directions are for 2 cups … 2 cups is the problem with the batches not drying out.
Sorry! That’s a typo ?? it’s 2 tablespoons.
Do you mix in any water? This recipe seems too dry?
Hi Kim! It might be that the ingredients you’re using or altitude you’re in is a bit different than mine. If it’s too dry just add more coconut oil until you can mold the mixture.
I’m making these now with the 2 tbsp of coconut oil and I still have a bowl of all powder… it doesn’t seem like nearly enough??
Sometimes if you get different ingredients this could happen due to the water content on those ingredients. You can just add more coconut oil until it gets to stickier, moldable consistency.
These bath bombs look so pretty. I have pink Himalayan salt I want to use it instead of Epsom salt for all its amazing benefits and give them a natural light pink color. I can’t wait to try this recipe!