It’s been about 2 years or possibly more since we saw Frozen for the first time, but it is still an all time favorite in our home. My girls love it so much that we own way too many Frozen toys and every chance we get, we make Frozen theme crafts.
One of our favorite characters is Olaf. Who doesn’t love Olaf? He’s fun and cuddly! Plus he has such a unique look it makes for great crafts and activities.
When my second child was still a baby we started experimenting with sensory bags. My oldest loved to play and make crafts and my youngest always wanted to be a part of it, but unfortunately she would also try to eat every single item we used for our crafts. That’s why I started converting all the activities for my older child into sensory bag activities for my youngest.
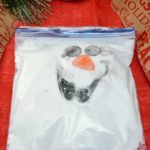
This Olaf sensory bag it’s so much fun! Both of my kids have played with this for long periods of time. Plus it’s really easy to make, even if you’re not crafty. Believe me, I am not crafty at all!
For this activity, you can use whip cream or white shaving cream. I prefer to use whip cream because my kid has tried to bite the sensory bags and by using whip cream I don’t have to worry about her tasting it.
Making this for more than one kid? Then make our Decorate a Christmas Tree sensory bag too!
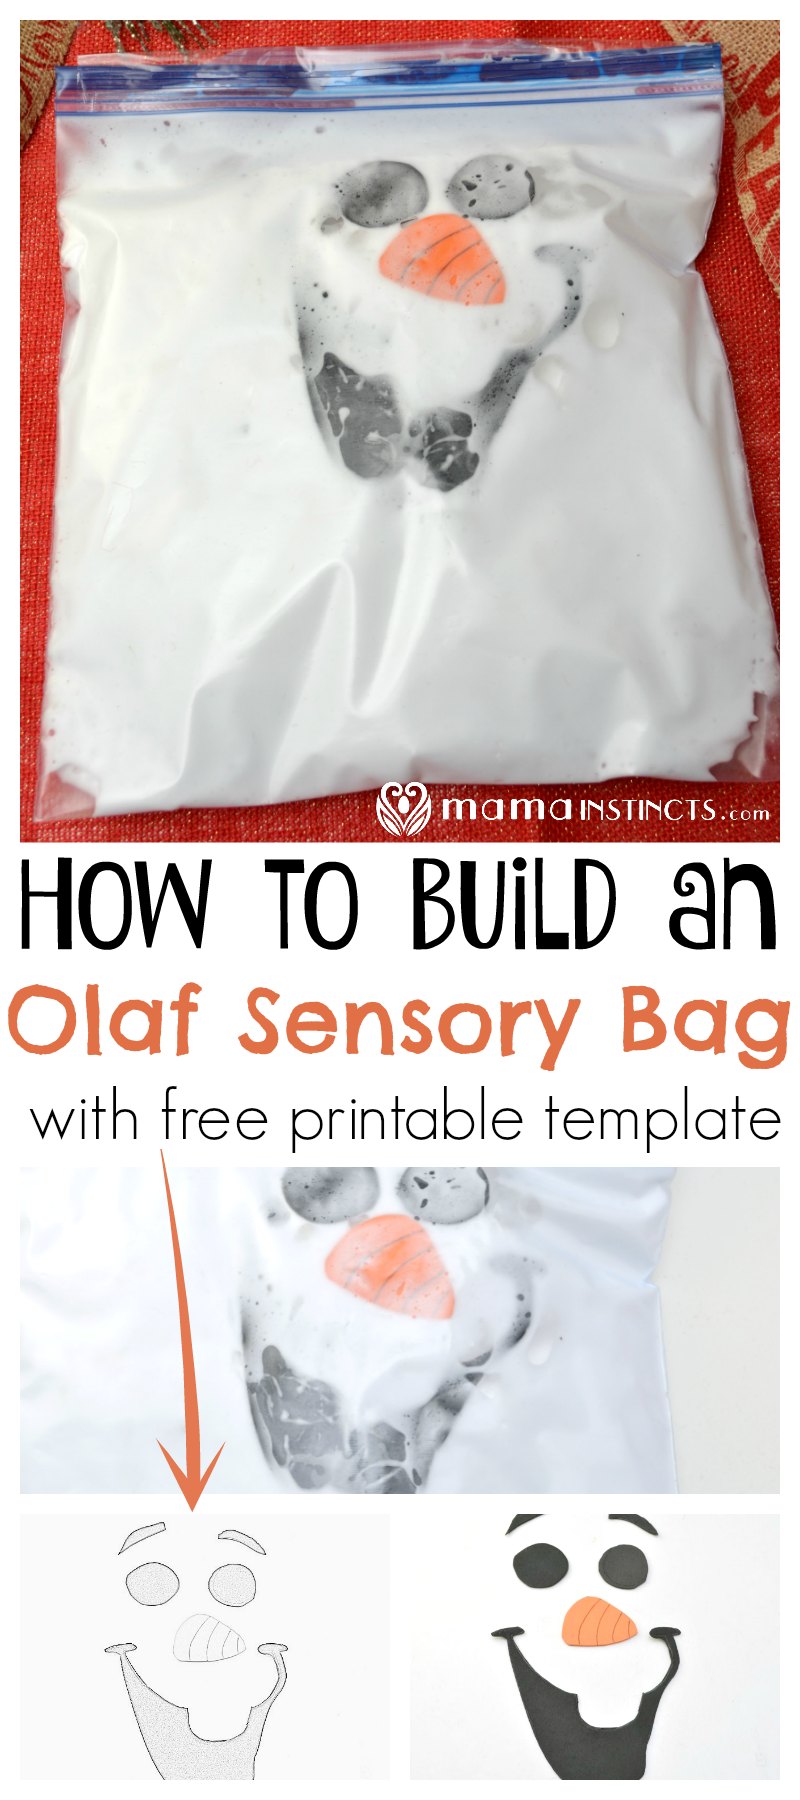
How to Build an Olaf Sensory Bag
Materials:
- Whip cream or white shaving cream
- Black craft foam
- Orange craft foam
- 1 gallon Ziploc bag
- Scissors
- Pencil
- Packing tape
Instructions:
Download Olaf’s face template here. Keep in mind I am not the best crafter/artist, so if you’re good at drawing then you should draw Olaf’s face.
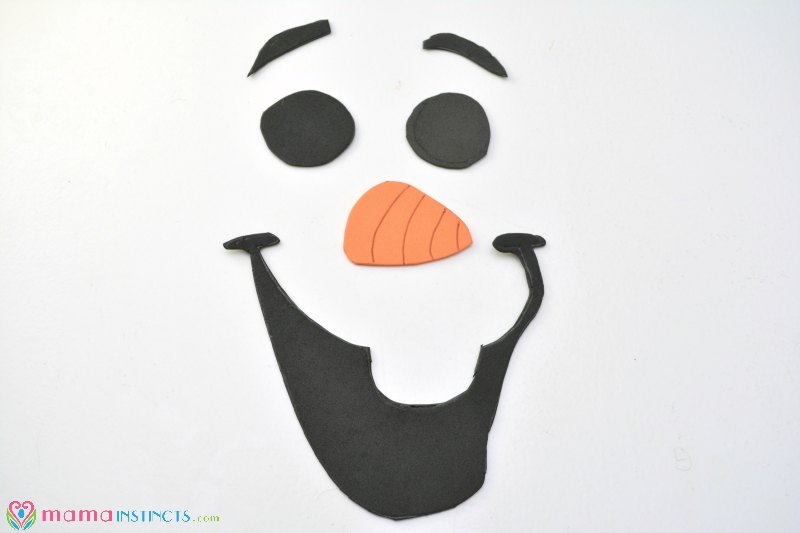
Print the template and use it to cut Olaf’s face by using the black and orange craft foam.
Use the back craft foam to cut two circles for the eyes, two eyebrows and one mouth. Leave a gap in the top of the mouth for the white shaving cream to show through, this will make it look like Olaf’s teeth.
Cut out a triangular carrot shaped nose with rounded edges from the orange craft foam.
Tip: My girls love it when I cut out two face templates because they can make Olaf look silly.
This is what the face should look like:
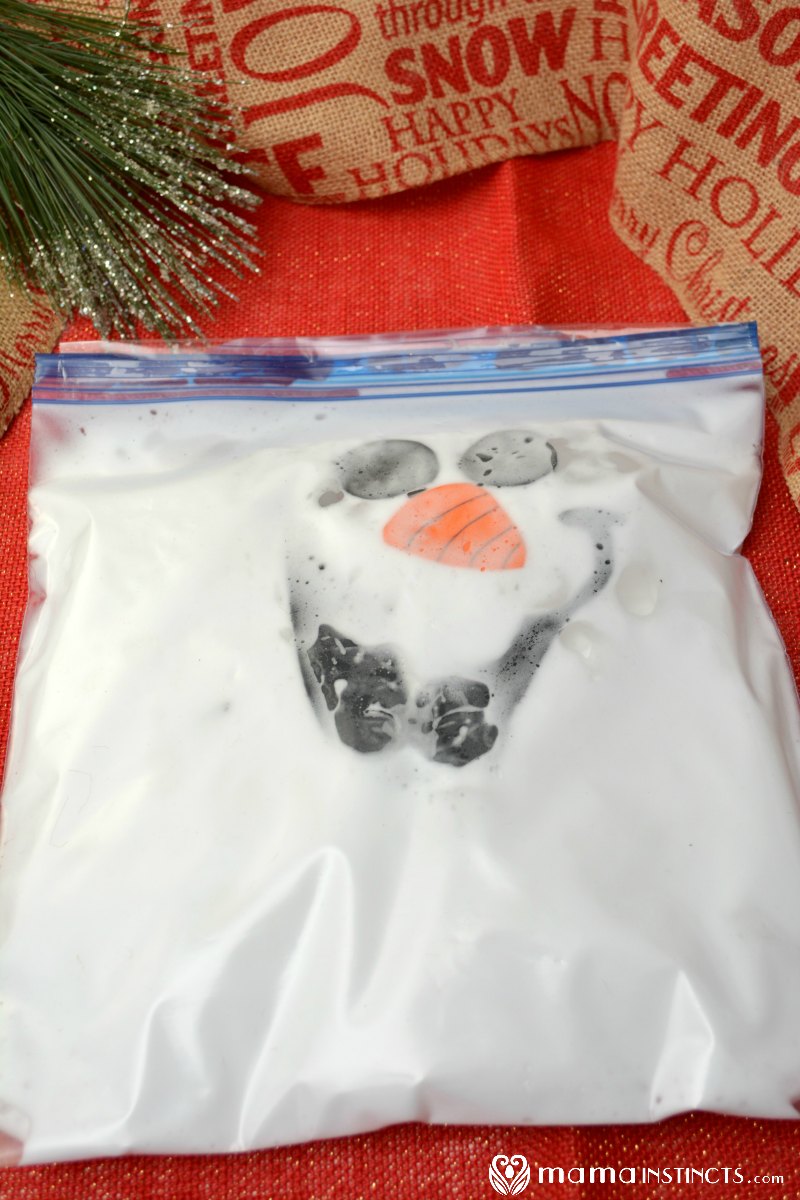
Open a Ziploc bag and fill it at least half full with whip cream or white shaving cream. Place the foam face pieces into the Ziploc bag along with the whip cream. Try to get as much air as possible out of the Ziploc bag and close it tightly.
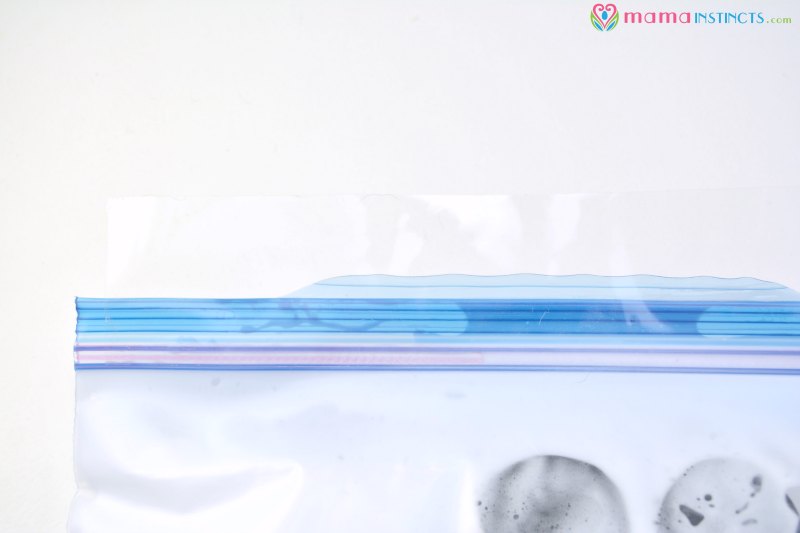
Use a strip of packing tape to secure the top of the closed Ziploc bag and prevent leaks.
If you’re making this sensory bag for a baby or younger toddler, tape it down to a table. Just add one strip of tape along each side. Your baby will be able to move the pieces around while the bag stays in place.
Now the fun begins!
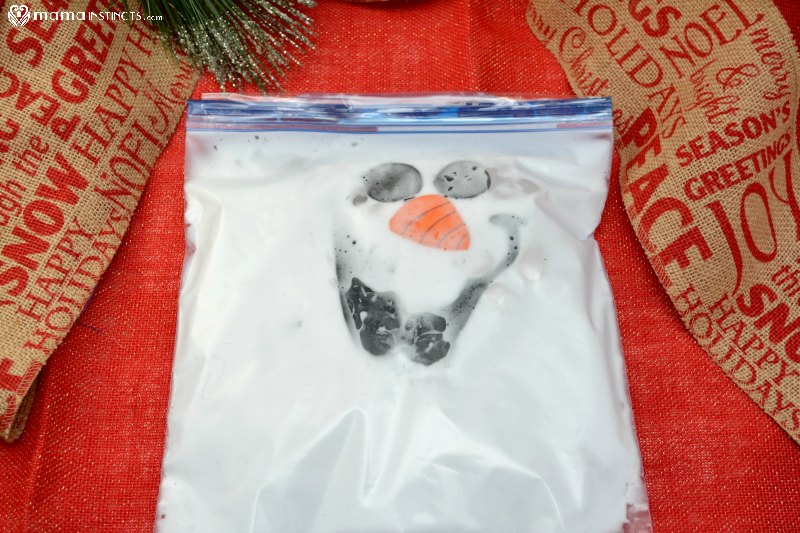
Let your little one push around the foam pieces to build Olaf’s face for sensory play!
The pieces disappear in the foam and reappear as they move them around, making this simple sensory kid activity entertaining for long periods of time.
How to Build an Olaf Sensory Bag Creation
Save this activity for another day by pinning this image:
Leave a Reply