I love incorporating the holidays by making fun and easy crafts with my girls. My oldest is almost 4 now which means she can do most crafts by herself and my 1 year old just tags along and make a silly version of whatever we’re trying to accomplish.
It’s a great way to celebrate whatever season we’re in and spend some time together. Plus making crafts helps kids developed their fine and motor skills, problem solving skills and sparks their creativity.
Christmas is my favorite time of year and when I think of Christmas I remember being a little girl waiting for Santa. So today I want to share with you a simple Santa Hand Puppet craft made with felt. The best part about this craft is that you can make a whole set of holiday puppets using different colored felt. You can make Mrs. Clause, an elf, snowman, and reindeer using the same technique.
So use this post for inspiration and have your kids make all the puppets they want!
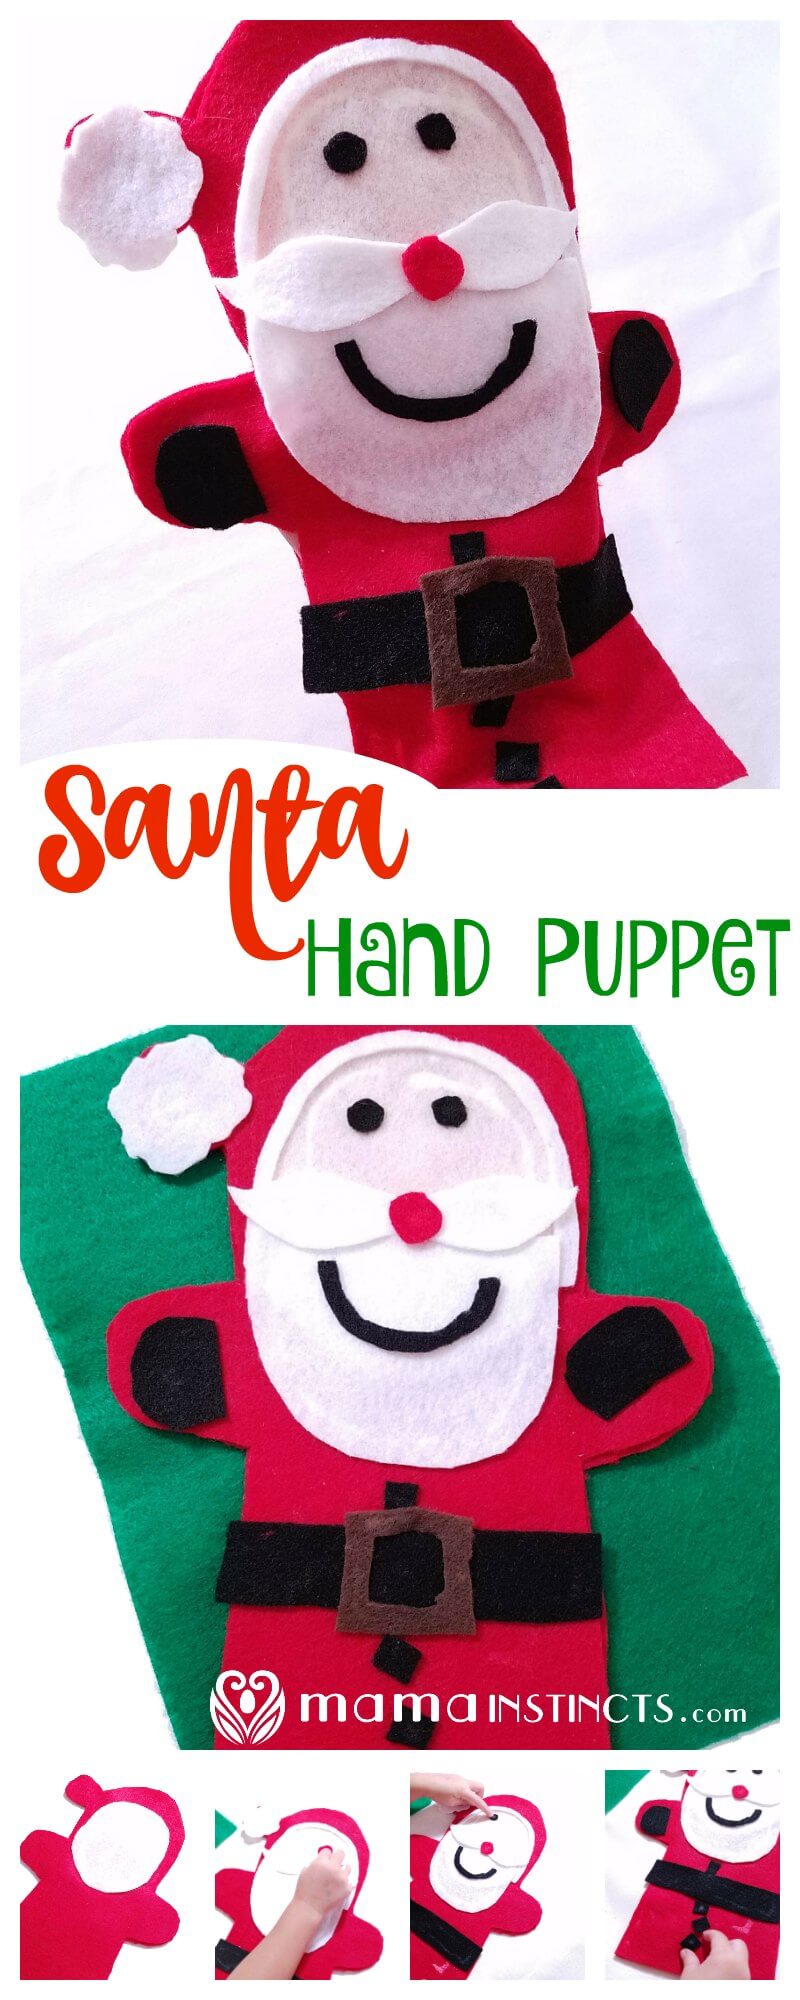
Santa Hand Puppet
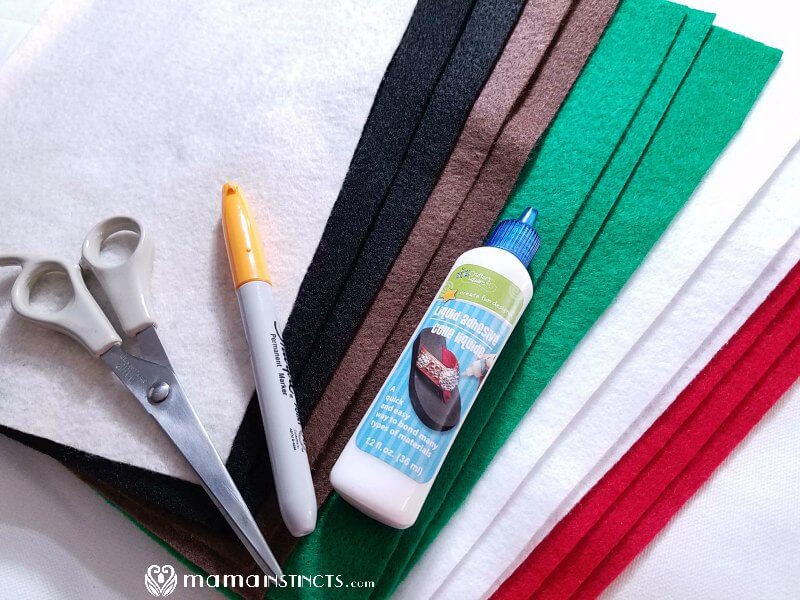
Materials:
This craft uses glue. If you want to skip the glue than you can buy adhesive felt instead.
- Red Felt (you can use red adhesive felt for Santa’s nose but for the body of the puppet you’ll need regular felt)
- Black Felt (Black adhesive felt)
- Peach Felt (use the white adhesive felt instead of peach)
- White Felt (White adhesive felt)
- Brown or Yellow Felt (Brown or Yellow adhesive felt)
- White glue that dries clear or low-temp glue gun
- Scissors
Note: you can also get this package with different felt colors or this adhesive pack instead of buying each color separately. That’s what I got and it has lasted me through a lot of felt crafts.
Directions:
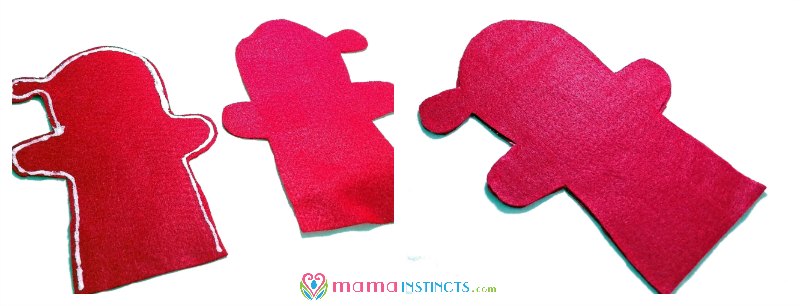
Place your hand in the center of a piece of red felt. Position your fingers so that your thumb and pinky are set apart from the three middle fingers. Trace the shape of your hand like a mitten.
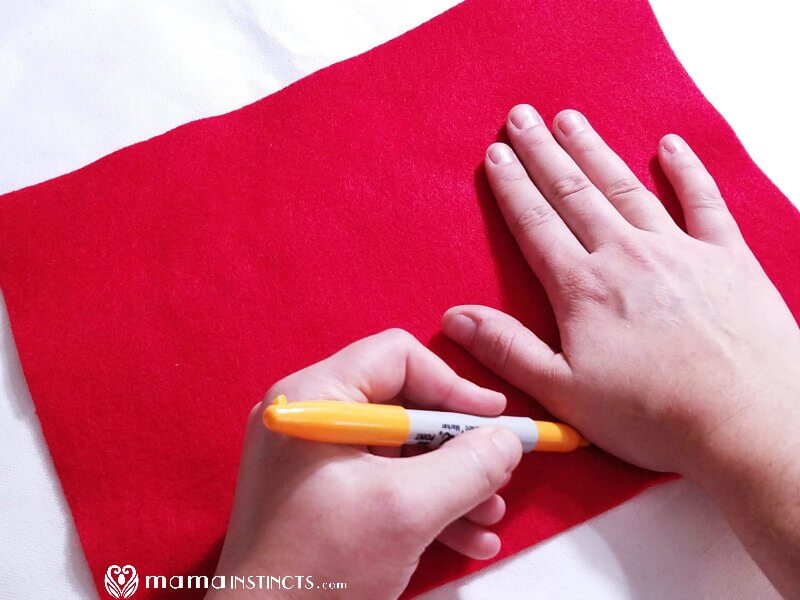
Draw around your thumb and pinky, these will be Santa’s arms.
Draw a circle on the side of Santa’s head. This will be the tip of Santa’s hat.
Cut out the shape on the red felt. Trace the shape on a second red felt and then cut out.
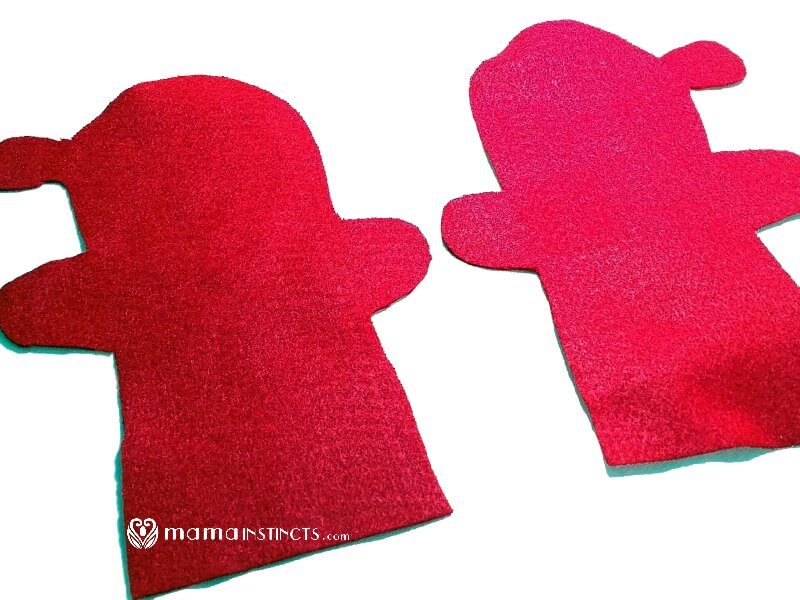
Glue the two Santa shapes together by applying a generous line of glue to the edges of the shape. Be sure to leave the bottom of the shape glue free. Set aside to dry.
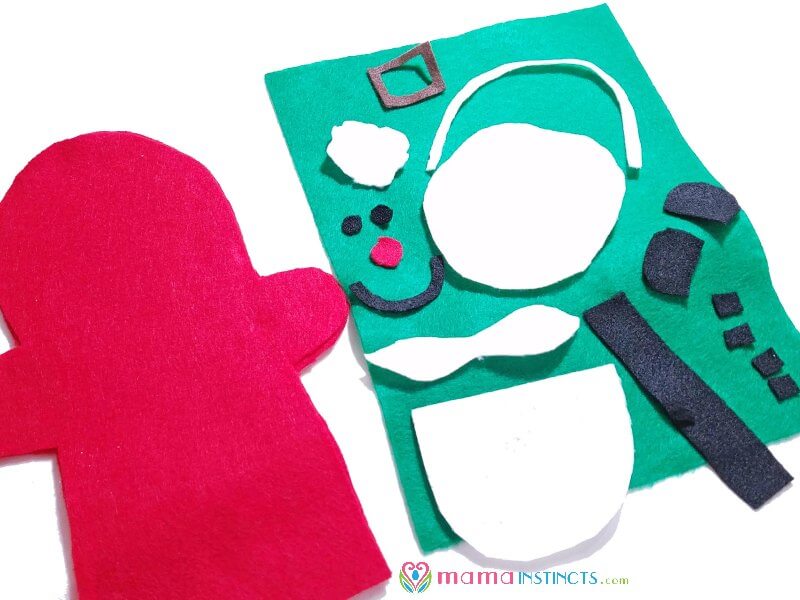
While the Santa mitt is drying, cut out the rest of Santa’s features:
- Use red felt for the nose.
- Santa’s face is made by cutting an oval from the peach felt or white felt if you can’t find peach.
- The hat’s trim, beard, and mustache are made with white felt.
- Black felt is used for Santa’s eyes, mouth, belt, mittens, and buttons.
- Use brown or yellow felt for Santa’s belt buckle.
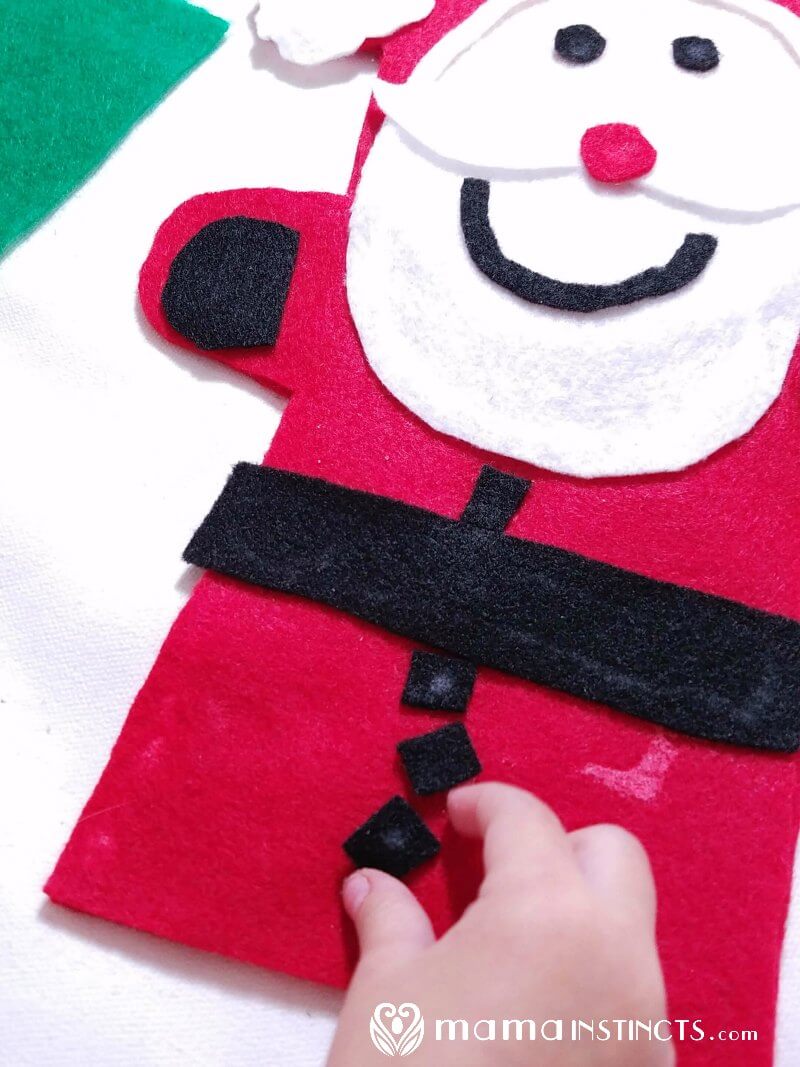
Now that all the shapes are cut and the mitt is dry, each piece can be glued onto Santa. If your child is old enough they can glue each piece into place. If they are still too small you can put the glue on each piece and your child can set it into place on the puppet. If you’re using the adhesive felt, then just peel and stick.

Let dry for a couple hours before playing with your new hand puppet. Then enjoy a puppet show.

Wasn’t that easy? I hope you have a blast making these with your kiddos.
Don’t forget that you can get creative with these and use other colored felt to make Mrs. Clause, an elf, snowman, and reindeer.

If you make a puppet I’d love to see it. Tag me (@mamainstincts) on instagram or twitter to show me your creation.
Santa Hand Puppet Creation

Leave a Reply